This script has two part one is backend for project dashboard with APIs and another is progressive web app (PWA) with React. Also It has swagger API documentation. So you can understand easily how many APIs are there and how it works. Click on APIs documentation to view
We used laravel installer so-that you can easily install it with any cpanel server. But we will describe how to install both Linux server and cpanel server and included the instructions of minimum php version, creating database and managing files on a server.
We are available in our support desk if you're not familiar with the procedures presented. Click on Support Desk
License
Regular License
Use, by you or one client, in a single end product which end users are not charged for. The total price includes the item price and a buyer fee.
Extended License
Use, by you or one client, in a single end product which end users can be charged for. The total price includes the item price and a buyer fee.
Please purchase Extended License if you are going to sell as a service. Envato License Policy
Server Requirements
It is laravel 9.0, it's minimum server requirements will check with laravel installer or alternatively you can contact with your hosting provider.
PHP >= 8.1
Mbstring PHP Extension
PDO PHP Extension
BCMath PHP Extension
XML PHP Extension
Ctype PHP Extension
Fileinfo PHP extension
JSON PHP Extension
OpenSSL PHP Extension
Tokenizer PHP Extension
Ubuntu / Linux / Localhost Installation
Go to your project @main folder of project root folder and follow the below step.
Step 1: Open your terminal/gitbash and run - composer install
Step 2: run - php artisan migrate
Step 3: run - php artisan db:seed
Step 4: run - php artisan serve
If you want to run project with valet. You do not need to run step 4. You have to open terminal with project and run the below commands.
Step 4: run - valet link eduman(project-name)
Step 5: for secure url run - valet secure eduman(project-name)
Now you are alomst complete your step, here you just need to clear cache with below commands.
Step 6: run - php artisan cache:clear
Step 7: run - php artisan route:clear
Step 8: run - php artisan config:clear
Step 9: run - valet link eduman
Step 10: run - valet link eduman
If you will change code, so you have to regenarate swagger api again. Don't worry you can do it with the below command.
Step 11: run - php artisan l5-swagger:generate
We are now in final stage. We need to compile sass & node packages with the below command.
Step 12: run - npm run install and npm run dev
Step 13( production ): run - npm run install and npm run build
Step 14: run - php artisan key:generate
CPanel Installation
There is prebuilt laravel installer and describe it step by steps in below:
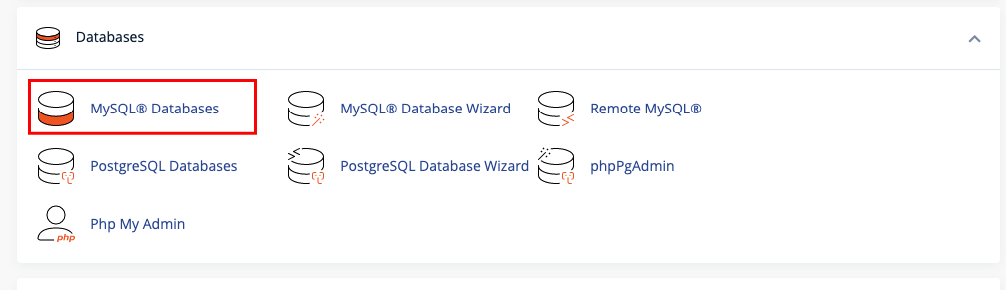
Create New Database
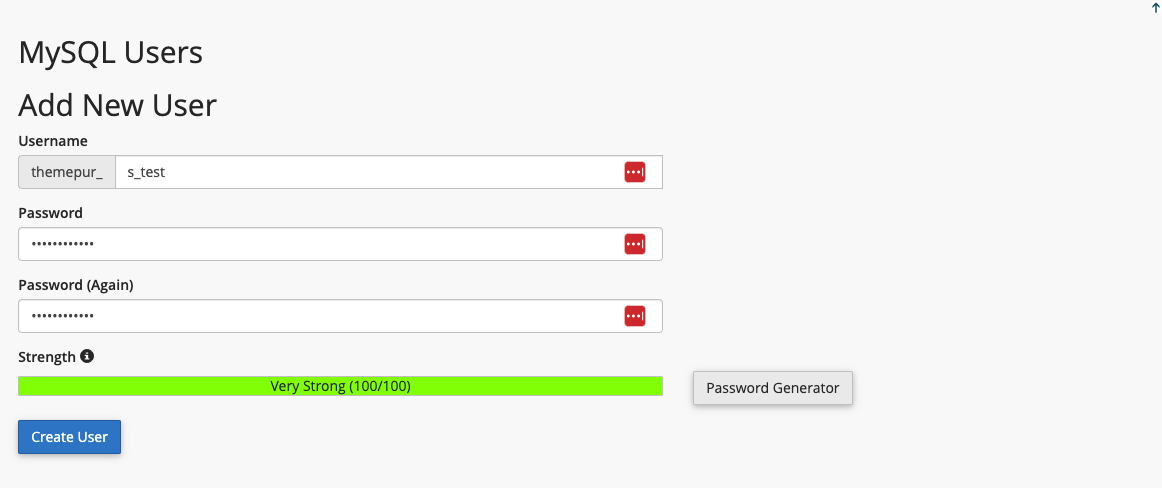
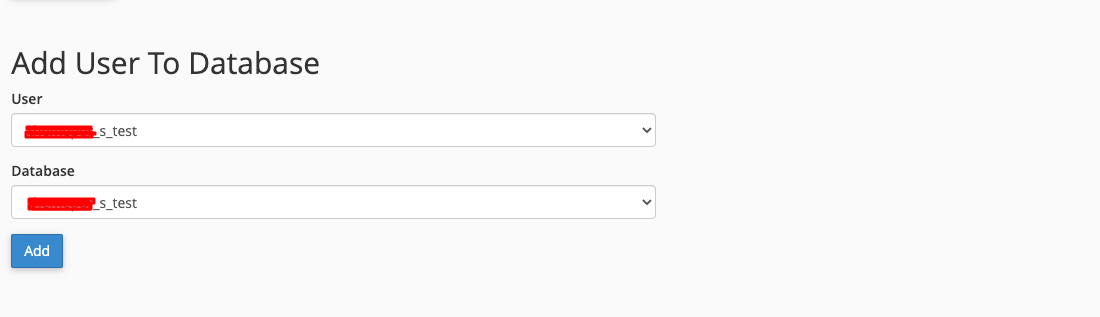
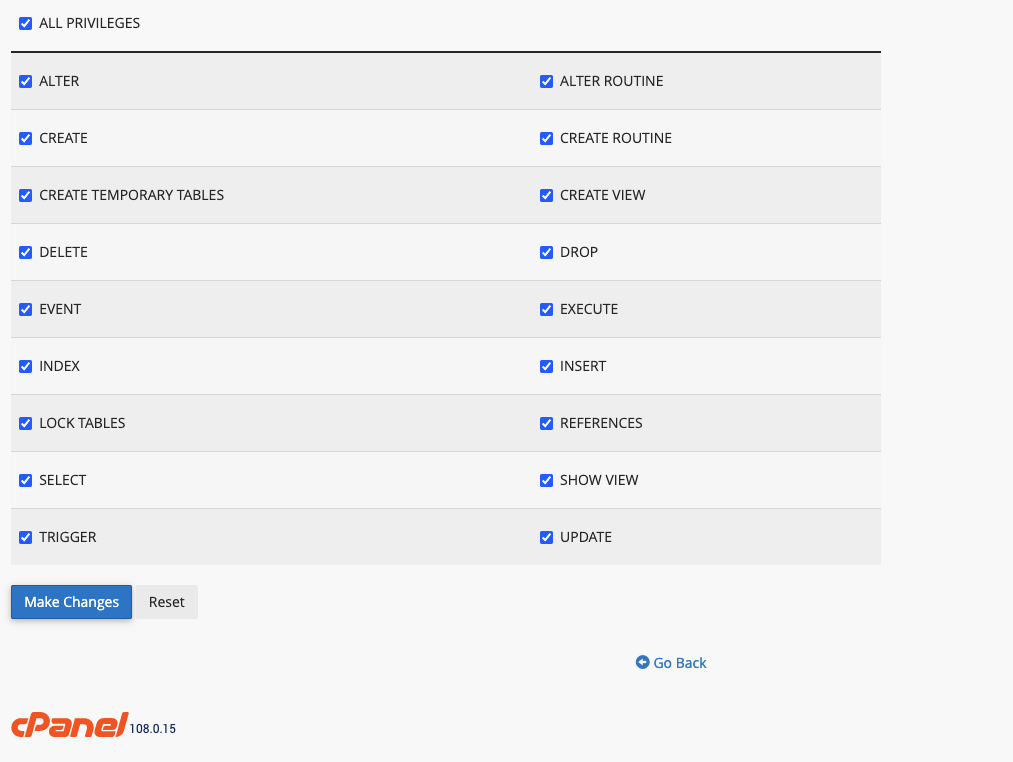
You need to create new database from cpanel before starting installation. You can follow the below steps:
Step 1: Create a new userStep 2: Add the user to the databaseStep 3: Select full permissions on the database to that user
Upload File to Server
Upload backend-eduman folder on the web root folder of your domain.
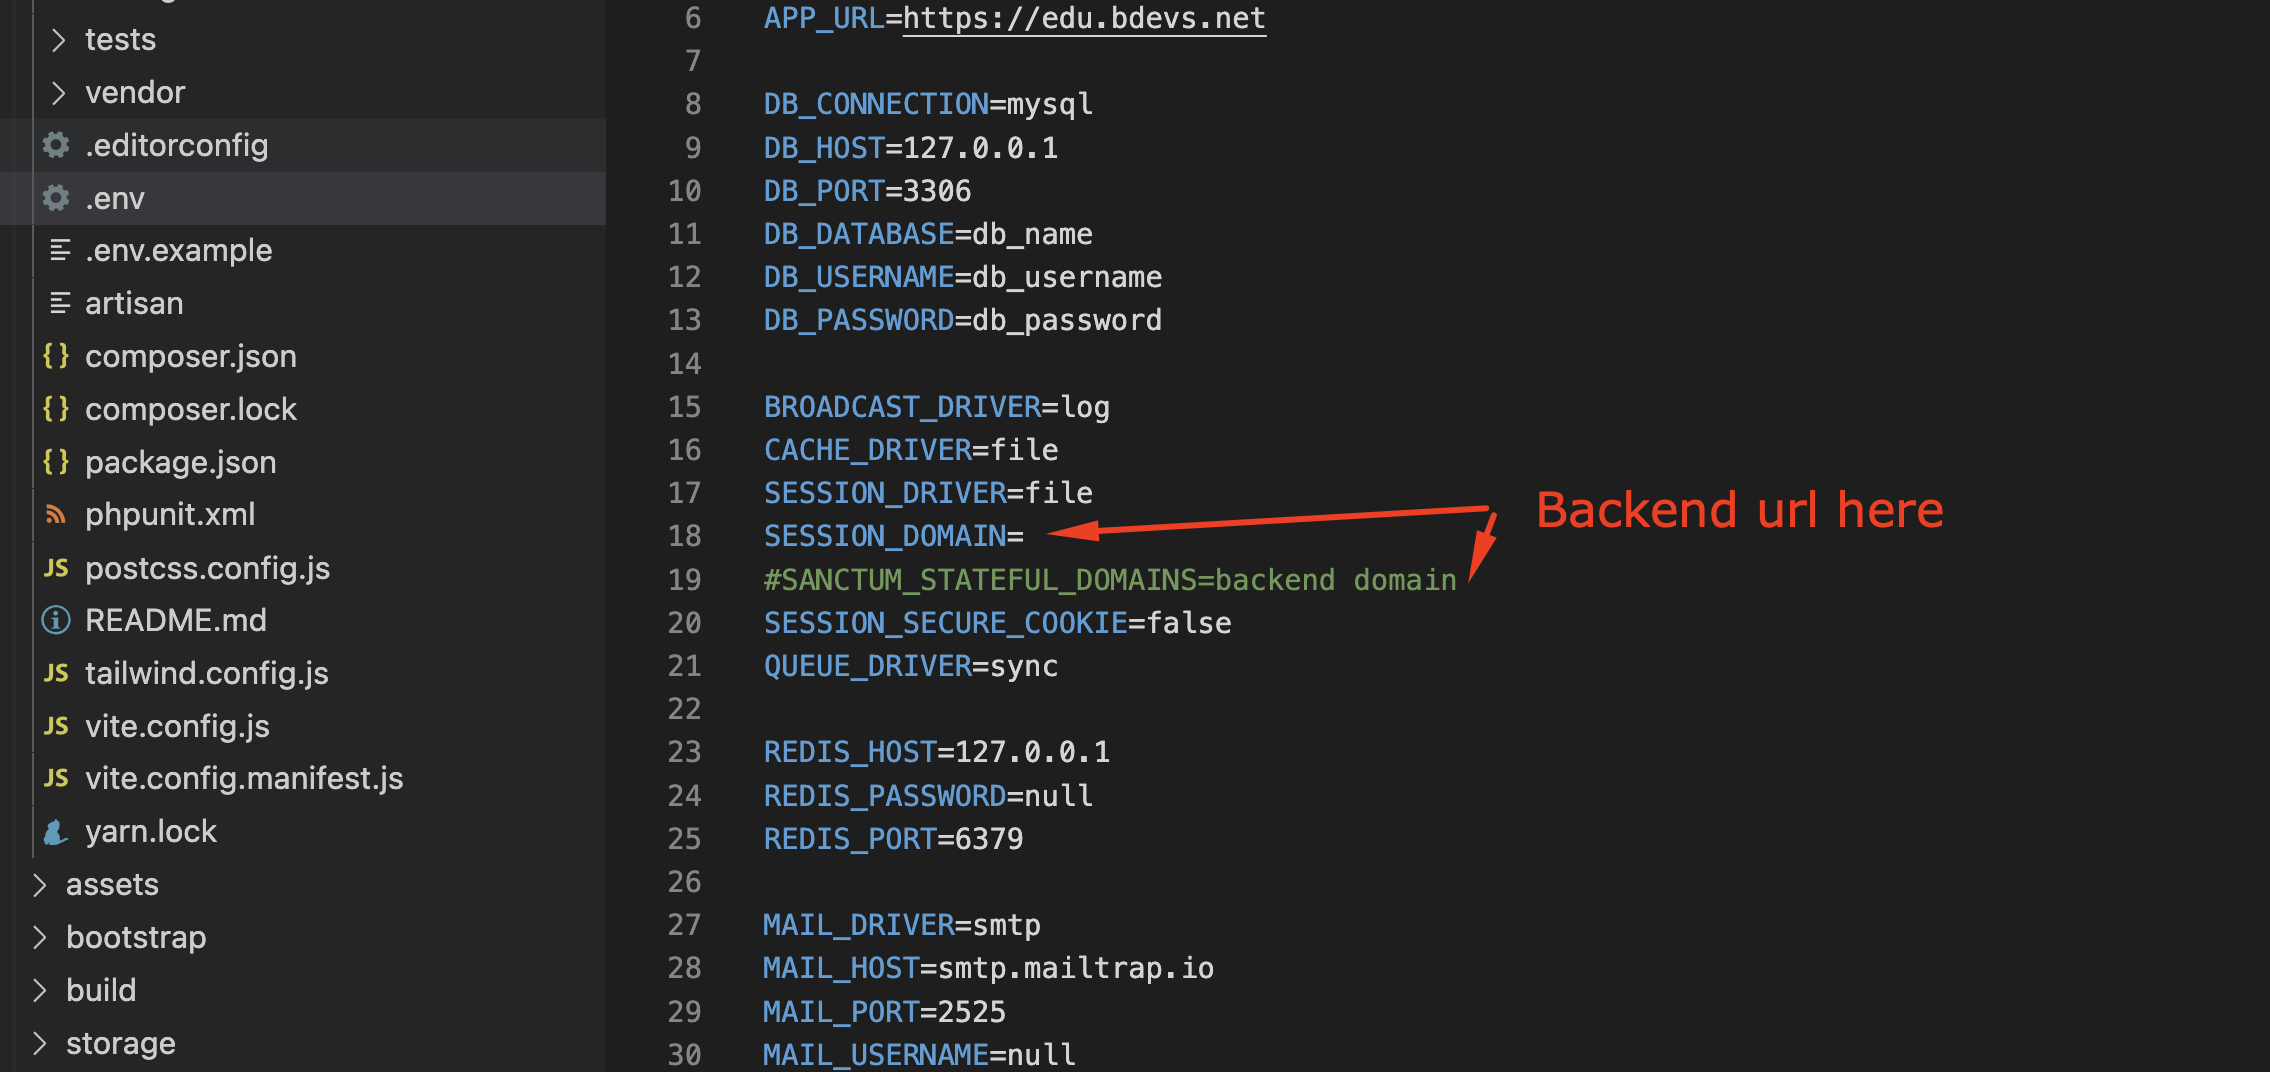
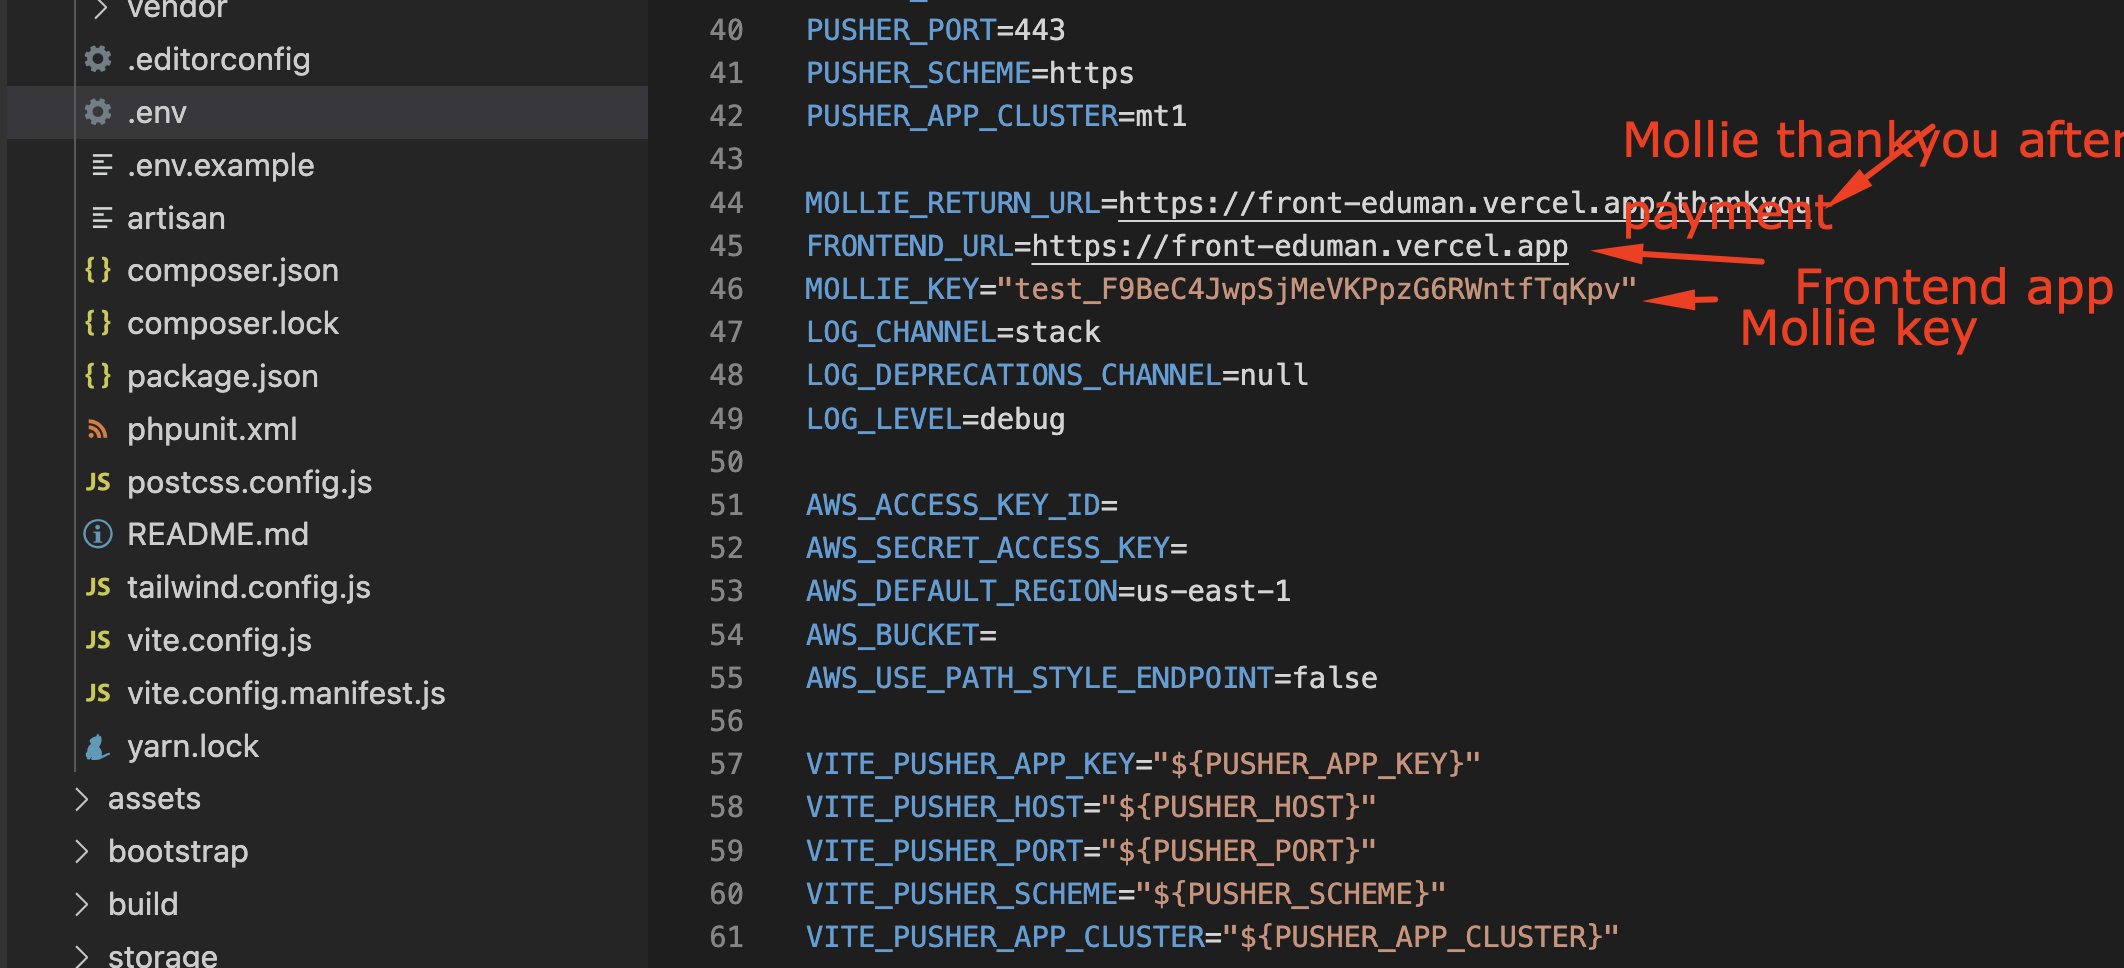
*** Make sure that you have .env file in @main folder of backend-eduman project.
*** Make sure that you have .htaccess file in root of backend-eduman project.
*** After running seeders, you have been missing media files & images. You can download files from https://edu.bdevs.net/source-files/images.zip and extract and put it in @main/storage/app/public folder of backend-eduman project.
Installation Wizard
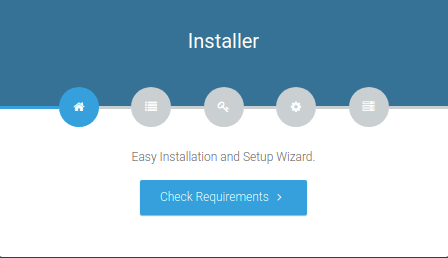
You are ready for script installation. Please go to your website address, then you'll see an installation wizard and follow the below steps:
Step 1: Open the laravel installer from the below link.
yourdomain.com/install or yourdomain.com/index.php/install
Now you can see the below screen.
Step 2: System Requirements
In this step, you need to click on "Check requirement" button. It will show the System Requirements.
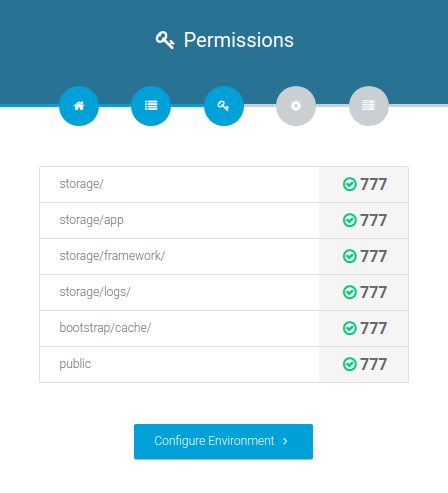
Step 3: Directory Permissions
In this step, you need to set the appropriate permissions for some system folders that shows on below picture.
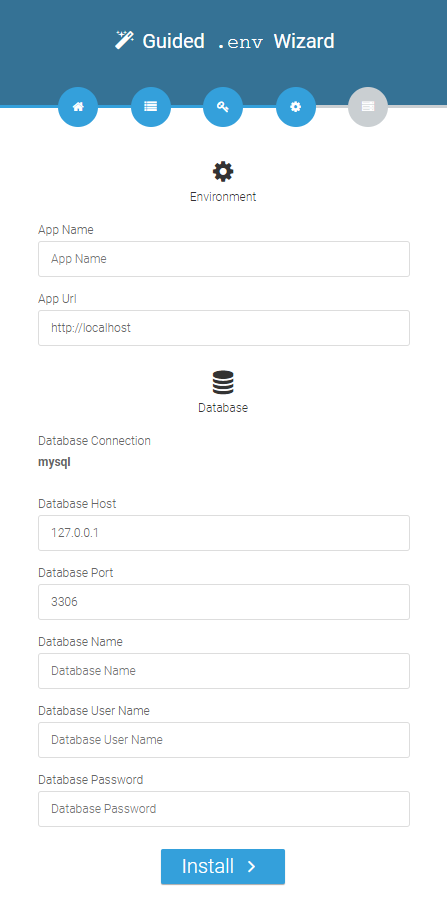
Step 4: Database Setting
In this step, You need to put your database credentials
final 5: Exit
exit now.
Dashboard Login
Wow, You have done all procedures of installation. Login your dashboard with below credentials.